Sourced from: https://www.loveandrenovations.com/diy-vent-hood-cover/
I’m helping my parents with a quick kitchen makeover and we kicked things off by installing a new vent hood and building a custom DIY vent hood cover – I’m sharing the tutorial today!
Over the last few weeks, I’ve been helping my parents with a little makeover in their kitchen. They have lived in their home for more than 25 years now and, aside from replacing the vinyl sheet flooring a few years back, they’ve never done anything to the kitchen to upgrade it. At all.
So, the stove is 25 years old. The laminate counters are 25 years old. Everything is 25 years old, and the entire space really needs some love.
They’ve been talking about doing some work to it for years now, but it kept getting pushed back. We got a really fun opportunity to work with Home Depot for a something we couldn’t use in our own home (more on that soon!), and I decided to gift it to them and help them transform their kitchen in the process.
This isn’t going to be a huge, dramatic makeover – no walls are being knocked down, the cabinets aren’t being replaced, and we’re really only focusing on half of the kitchen right now and will tackle the rest later – hopefully before Christmas.
I’ve been sharing some inside looks at the process on Instagram as my dad and I have been working, and I had a lot of requests to share some of the tutorials on the blog! So, today I’m sharing the first in a quick little series of posts about my parents’ kitchen makeover and I hope you enjoy it!
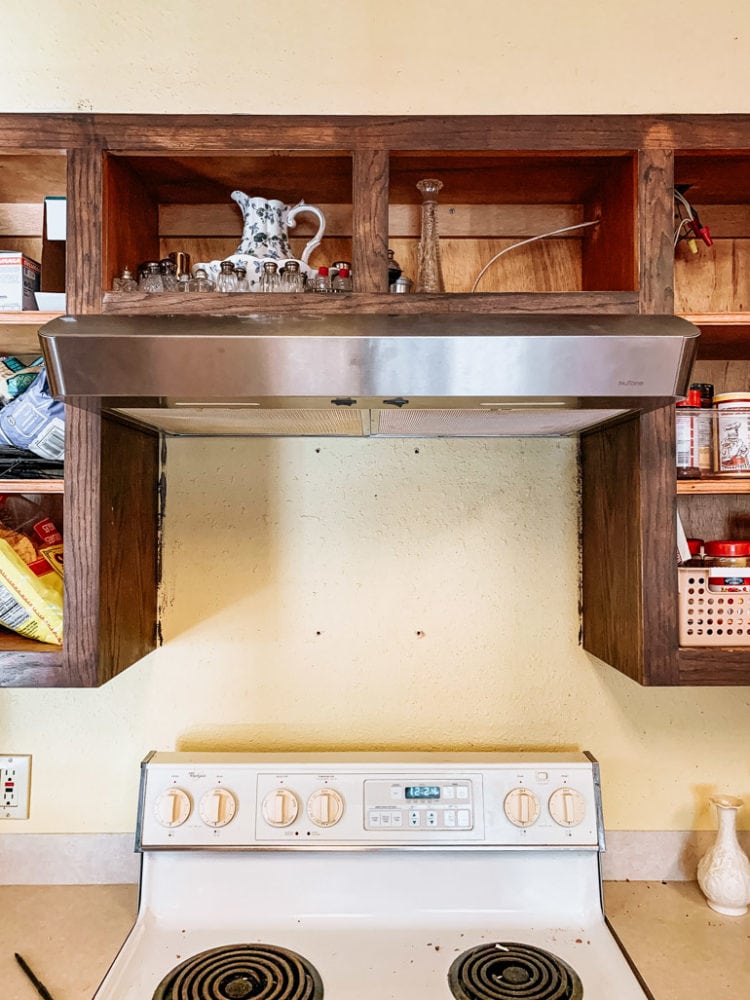
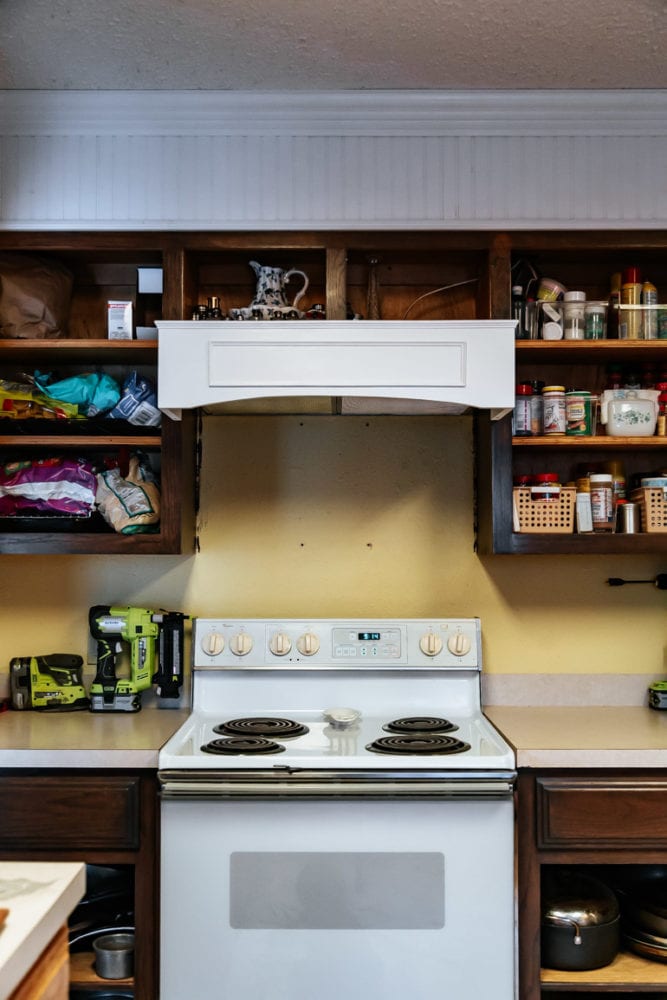
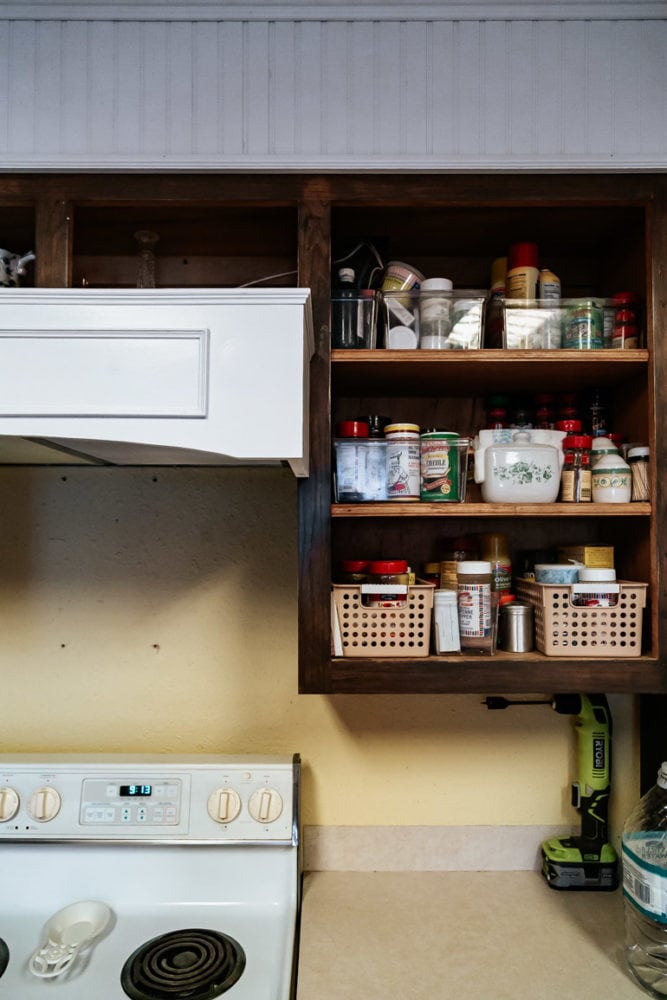
Here’s a little peek at the before of the space…
This post contains affiliate links. Click here to read my full disclosure policy.
One thing you might notice is missing (and has always been missing – for 25 years!) is a vent hood! My parents have never had any sort of vent in their kitchen, and it has driven me a little crazy every time I’ve cooked over there for as long as I can remember.
We knew that if we were doing any work in here, adding a vent hood would need to be one of the first things that happened. So, they snagged this affordable option and after my dad and I installed it, we built a DIY cover to make it look a little more custom.
Today, I’m going to show you how you can do the same! It’s a really simple project, but it makes a huge difference in how the entire space feels – it really upgrades things and makes the entire kitchen feel a little more custom.
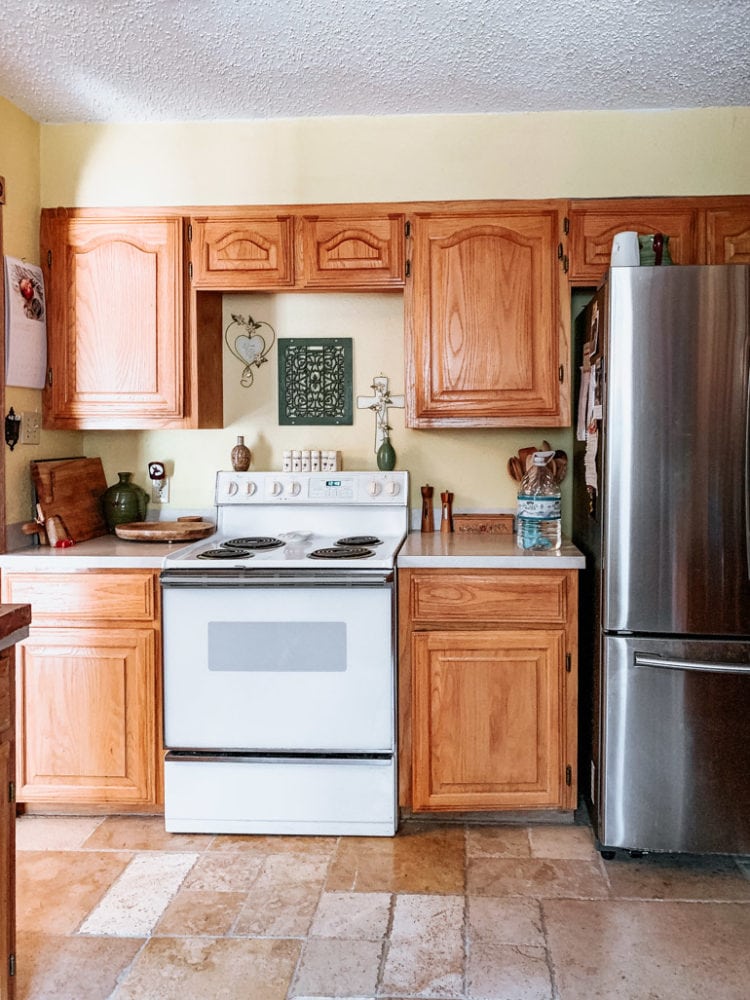
Of course, you’ll notice that the kitchen is still very much a work in progress! It has already come a pretty long way, but these are by no means official “after” photos – those will come next month once we’ve actually finished aaaaall of the projects!
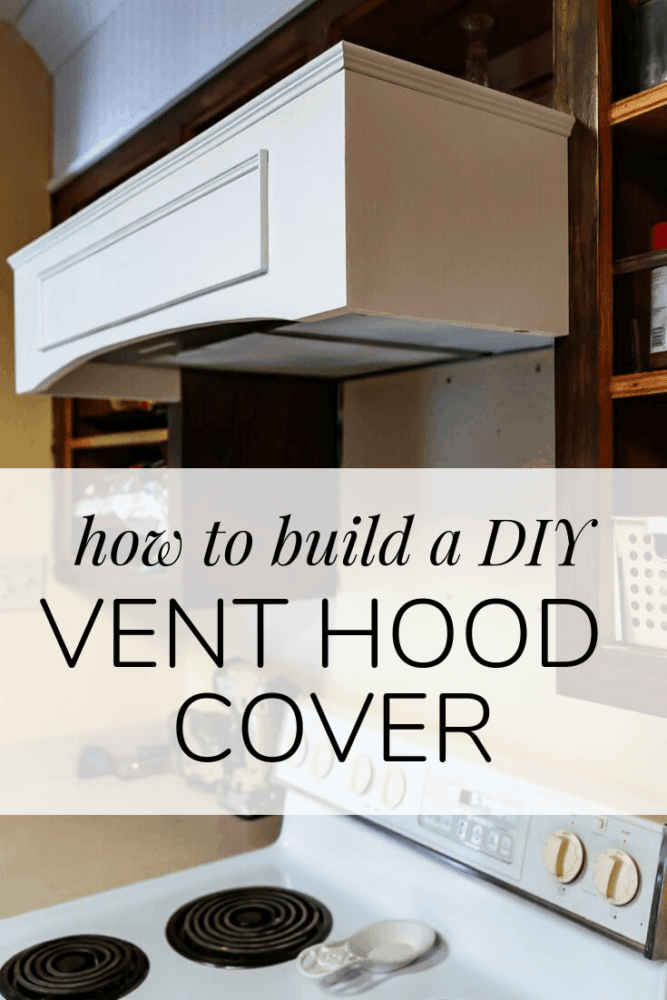
How to build a DIY CUstom vent hood cover
Materials needed:
- (1) 1X10 pine board
- Clamps (we used corner clamps)
- Wood glue
- Brad nailer + nails
- Speed square
- White paint
- Trim pieces (optional)
Step One: MEasure
The first thing you’ll need to do is measure to determine the size of your vent hood cover. This will vary depending on what vent you have. Start by measuring how far out it comes from the cabinets at its furthest point, then measure how far down it sits. You’ll want to add a couple of inches to the measurement for the sides to account for the arch!
For example, our top shelf comes 10″ out from the cabinets, and the vent hood cover is 8″ tall.
step tWo: Cut the top piece
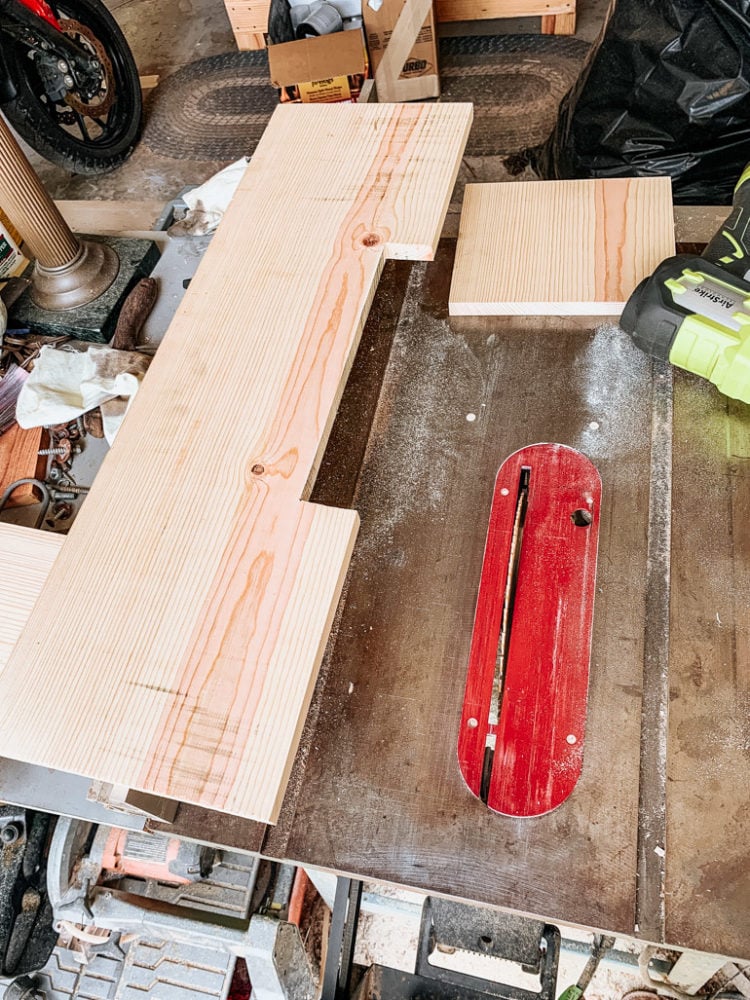
Once you know your measurement, you’re ready to start cutting pieces. We used the table saw to rip our board down to 10″ (we had a 12″ board because we weren’t sure of the sizing, but you can just grab a 10″ board instead), and cut it to be just over 30″ long (the vent hood itself is exactly 30″ long, so we added about 1/8″ so it would fit snugly.
We also had to cut a small notch out of the top board to account for the vent on the top. It’s not visible at all once it’s hung, but it allows the air to escape, and the shelf is still functional.
Step three: Cut the side pieces
Next up, cut the side pieces. They should be the same width as the top piece was, and the length will vary depending on the size of your hood. Ours were about 8″.
We determined the size of our side pieces by measuring how far down the vent hood went and then adding 3 3/4 inches. We wanted the cover to sit a couple of inches below the hood (so it’s fully covered), and then we added another inch so that we could add an arch to the front. The additional 3/4″ is because the side pieces will sit flush with the top of the cover, so you need to add on the thickness of the top board.
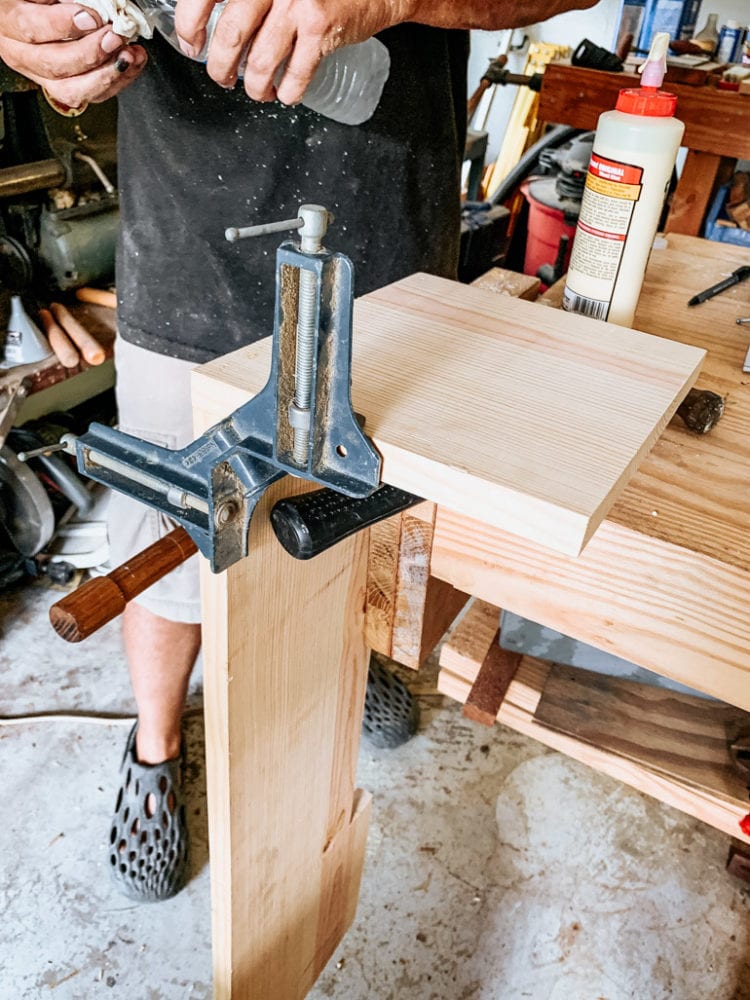
Step Four: Assemble the vent hood cover
Now you’re ready to begin assembly!
We simply assembled our vent hood cover with some wood glue and nails. Be sure to use a speed square to ensure that your side pieces aren’t angled at all. We used corner clamps (they’re much easier for this kind of project!), but you can make do with regular clamps if you don’t have any corner ones on hand.
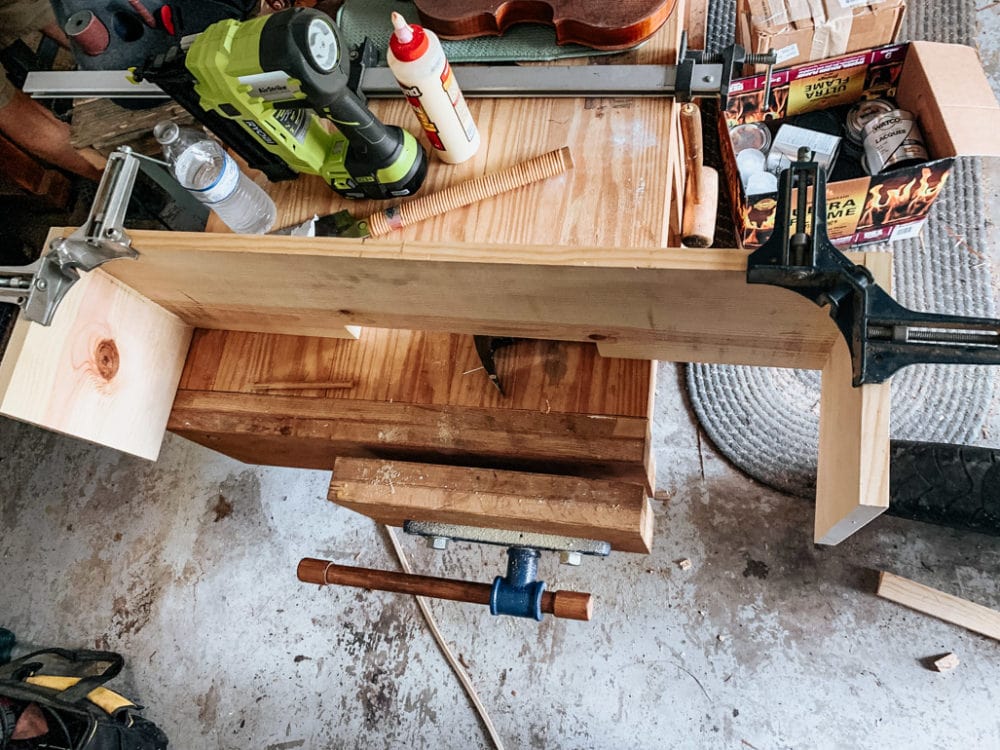
Step five: Cut front piece and finish assembly
Now you’re ready to cut the piece for the front. You can just take measurements off your vent hood cover to determine the width and height you need to cut to (the height should be the same as the side pieces).
Once you’ve got the base shape cut out, you can add the arch. I wish I had a genius tip for how to do this, but we really kind of winged it. We decided we wanted our arch to start 3″ in on either side, and only go up 1″. So, we made those marks on the hood, then we used some string and a pencil to draw a small arch. We cut it out using a bandsaw (you could also use a jigsaw!), and then sanded it until it was smooth.
It’s not perfect, but you’d never know the difference!
Step Six: Add Trim and Paint
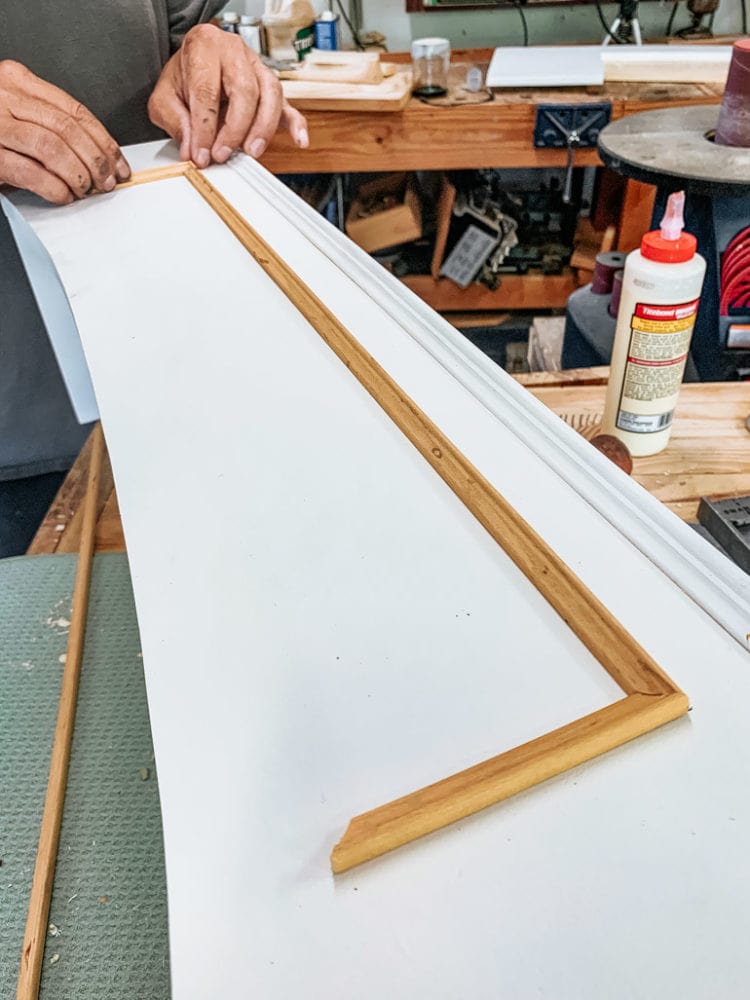
Finally, you’re ready for the finish work! We added some trim to the top, and (at the last minute) decided to add a square to the front with some smaller trim – I love that it adds some detail and emphasizes the arch on the front.
We painted the whole thing with our sprayer (see how to use one if you don’t know!) and once it was dry, it was ready to be hung!
Step seven: Hang it up!
We hung the vent hood cover using pocket holes. Dad added one pocket hole at the bottom on each side (to attach to the cabinet on either side of the vent hood) and four along the top (to attach to the cabinet above the hood).
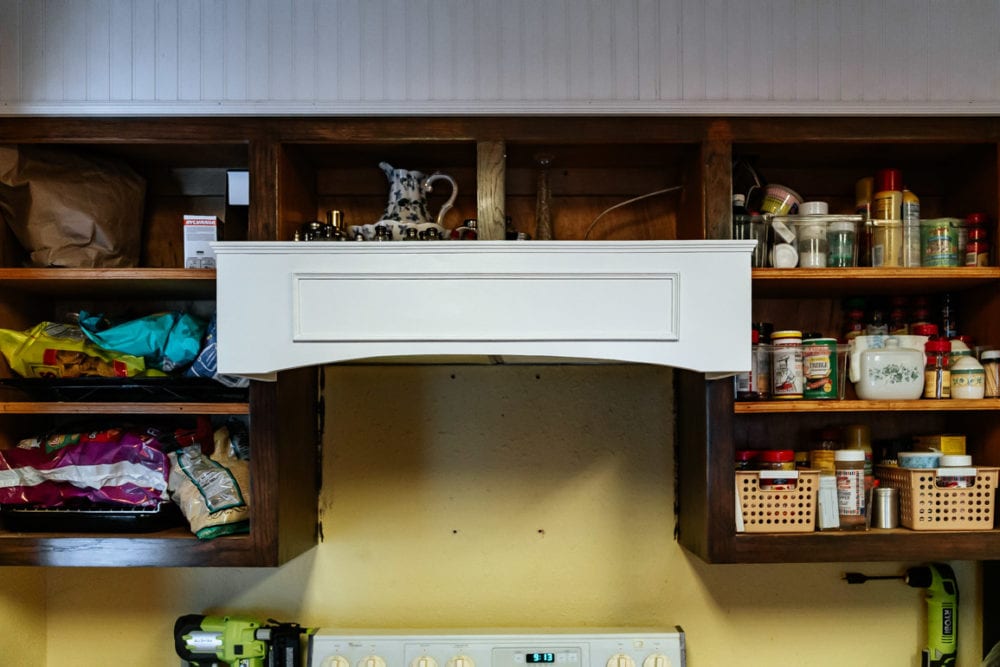
Once it’s all in place, it looks a little something like this:
This was such a quick and easy project, and I love how it turns out. This is, of course, just the first project in a whole series of fun projects we’ll be doing in this space over the next month, so be sure to stay tuned to see what’s next!
The post Easy DIY Vent Hood Cover appeared first on Love & Renovations.