Sourced from: https://www.loveandrenovations.com/diy-acrylic-lap-desk/
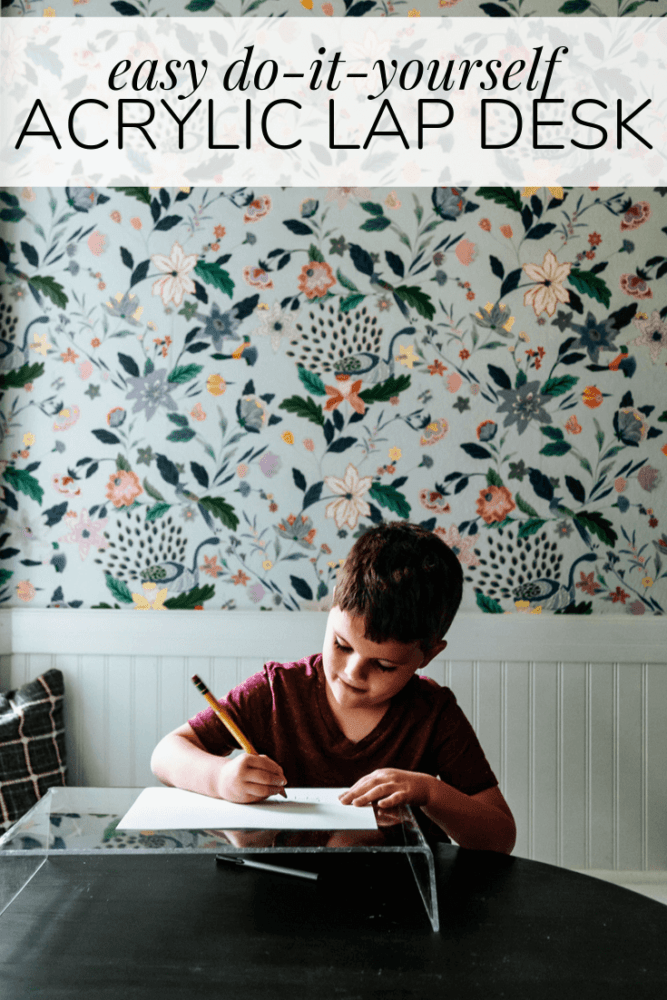
this easy DIY acrylic lap desk takes less than an hour to make, and the materials cost under $30! Learn how to make a simple lap desk or DIY acrylic tray yourself right here.
Ever since we reached the point in the moving process where I can’t really change anything in my house (since, you know, someone has pledged to buy it as it is and it’s time to start thinking about things like packing, not renovating), I’ve been itching to just make something.
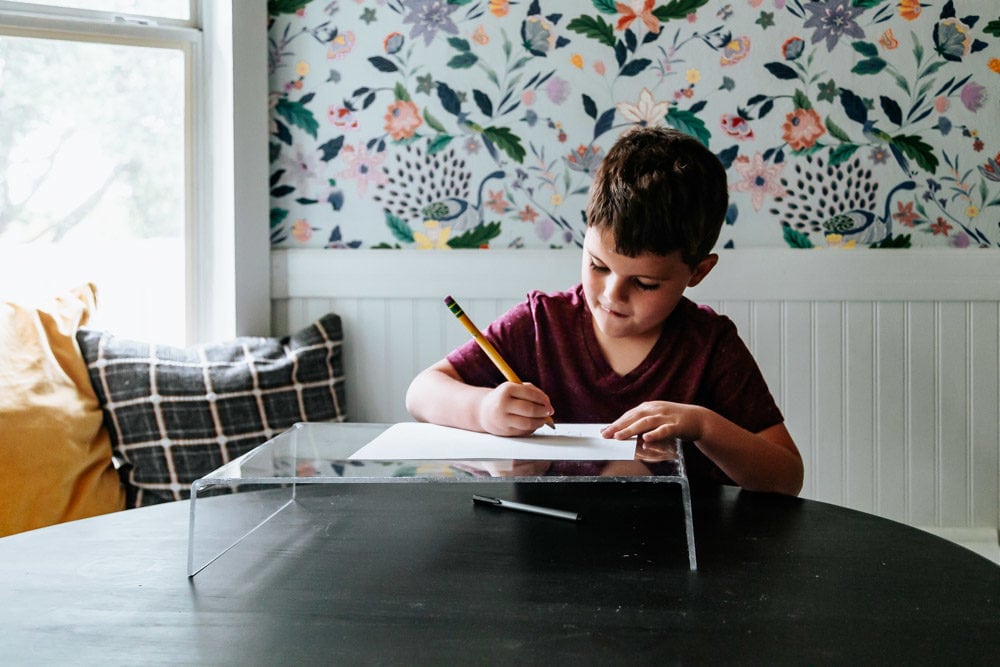
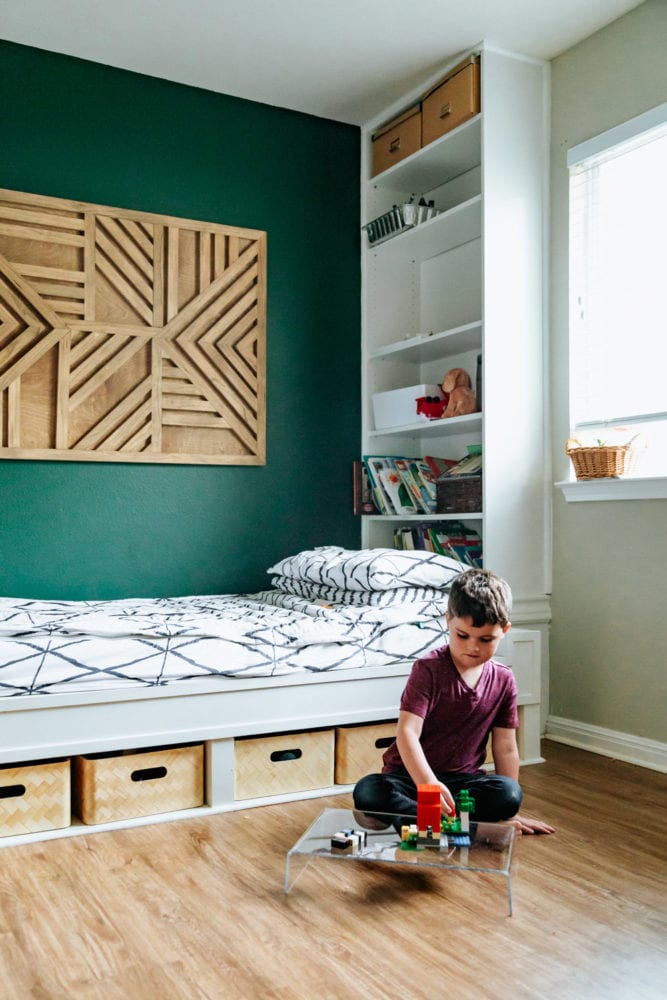
I’m used to having projects that I’m doing all the time, and this lack of stuff to do has been getting to me. So, this weekend when I had the idea to create a little acrylic lap desk for Jackson to play LEGOs on or use to draw, I was thrilled to have the chance stretch my creative muscles a bit.
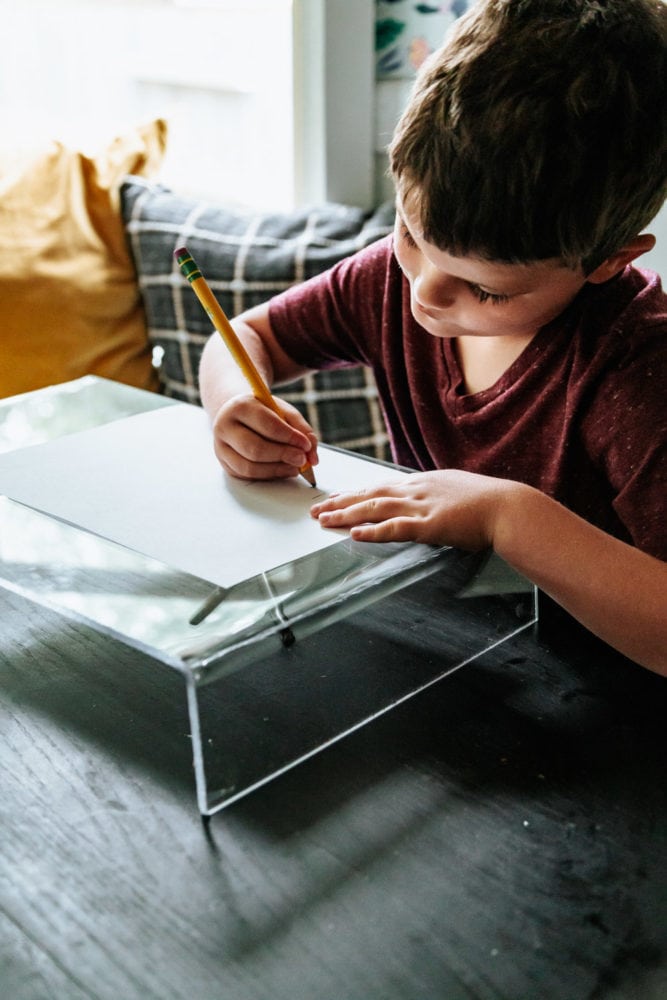
Ever since Jackson started school this year, he’s been really into drawing, labeling things, and creating. He’s always loved coloring, but his creativity has really blossomed in the last few months and my home is littered with pieces of paper with random Pokemon and Minecraft characters all over them.
Of course, like most 5-year-old boys, he’s also super into LEGOs. He’s been doing a ton of building lately and has finally reached the point where he can actually keep his creations together and they don’t immediately get destroyed. We’ve been using the lids from the baskets in his room as little trays for him to keep his creations on (so they’re easier to continue playing with later), but that means that his baskets no longer have lids. Which, let’s be honest, drives me nuts.
So, a lap desk was the perfect solution to give him a place to store whatever he’s currently playing with, and also for him to bring in the living room and use as a little table to draw on while we’re all hanging out together.
The bonus is that when Grant suddenly becomes interested in whatever it is he’s working on, it’s really easy for him to pick it up and move to higher ground!
This post is sponsored by Wagner.
This little acrylic lap desk took me only about an hour to put together, and the only real materials cost was the acrylic, which was about $30 from the big box home improvement store. Not bad for a totally customizable (and adorable) acrylic lap desk, no?!
This is one of those projects that is so easy it almost doesn’t need a tutorial, but I’ll share anyways. I promise this is something you can do yourself in no time, and your kid will love it!
DIY Acrylic lap desk
Materials & Tools
- 18X24 clear acrylic sheet (mine is 1/4″ thick)
- Circular saw (you could also use a table saw or jigsaw)
- Wagner Furno 500 Heat Gun
- Scrap wood (I used one long piece and one smaller piece)
- 2 clamps
Cut your acrylic to size
First up, you’ll want to cut down your acrylic so that it measures 12″ wide by 24″ long. I tried to do this just by scoring it with a utility knife, but the 1/4″ acrylic was much too thick, so I had to grab the circular saw. You can see my tutorial on how to use one right here! You could also easily use a jigsaw (here’s that tutorial) or a table saw. You can also have them cut it for you in-store at most hardware stores for free! There’s a plastic and glass cutting station right next to the acrylic at our store, so if you don’t have the tools or don’t want to do it yourself, just have them take care of it for you.
Set up your workstation
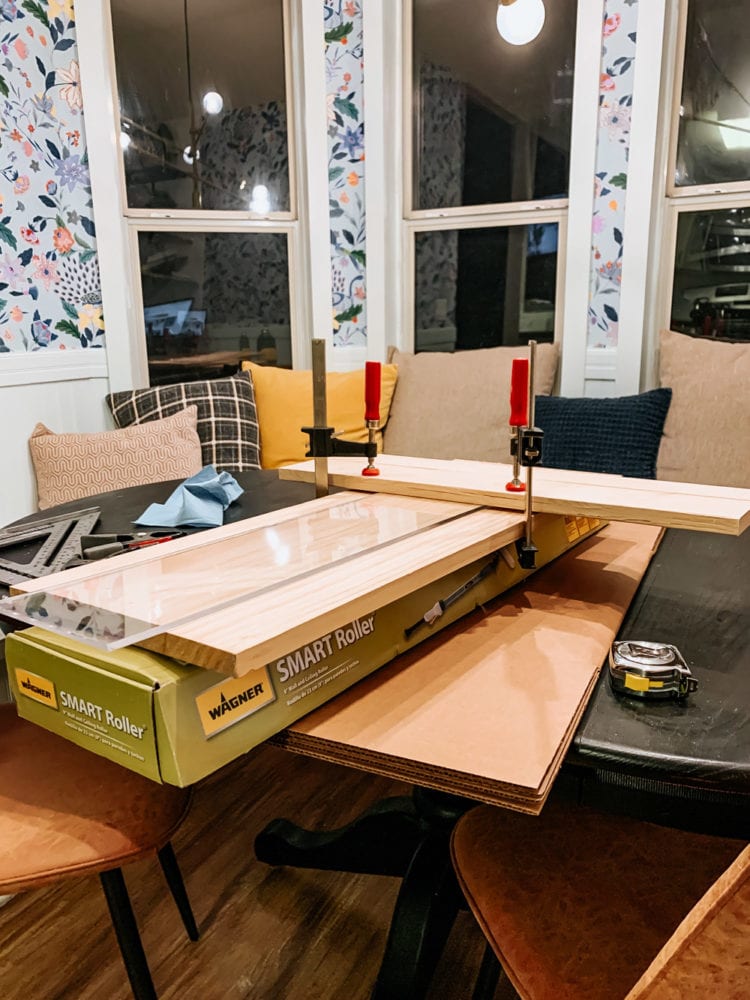
The next thing you’ll want to do is set up your work area so you can be safe (heat guns are, um, hot), and work quickly so you don’t crack the acrylic.
Let me break down what’s happening in the above setup:
- At the bottom, there’s a cardboard box on my table (just to protect it from scratches or heat)
- On top of that, there’s a long, skinny box that is being used just to hold the entire thing up a bit.. As you can see, the clamps hang below the scrap wood, so I just needed something to prop it all up. You could also use scrap wood for this, I just grabbed what I had.
- Next we have a big piece of scrap wood that is acting as my work surface and a place to clamp to.
- Then, I placed the acrylic on top and clamped the smaller scrap board on top – this is the piece that acts as your corner for folding. More on that below.
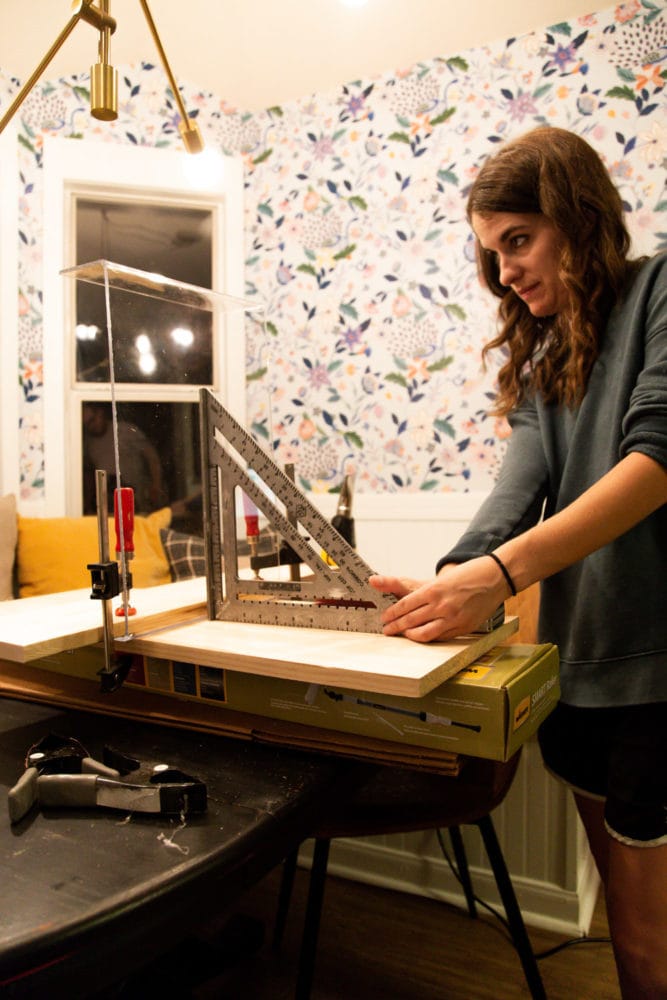
Measure and clamp down your acrylic
Once you’ve got your work area set up, you’re ready to clamp your material in place. Line your acrylic piece up with the board on bottom (so you can be sure that it’s straight), and then place your smaller scrap board so that it covers the back 3 inches of the acrylic. Be sure to measure from both sides so you know it’s straight across, and clamp it into place, as pictured above.
Grab the heat gun!
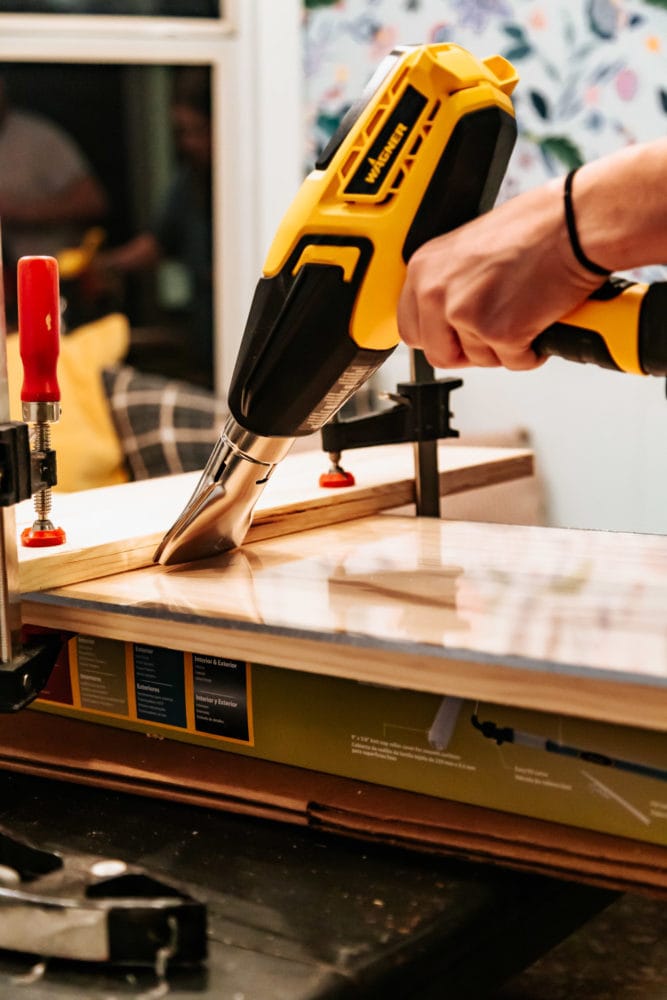
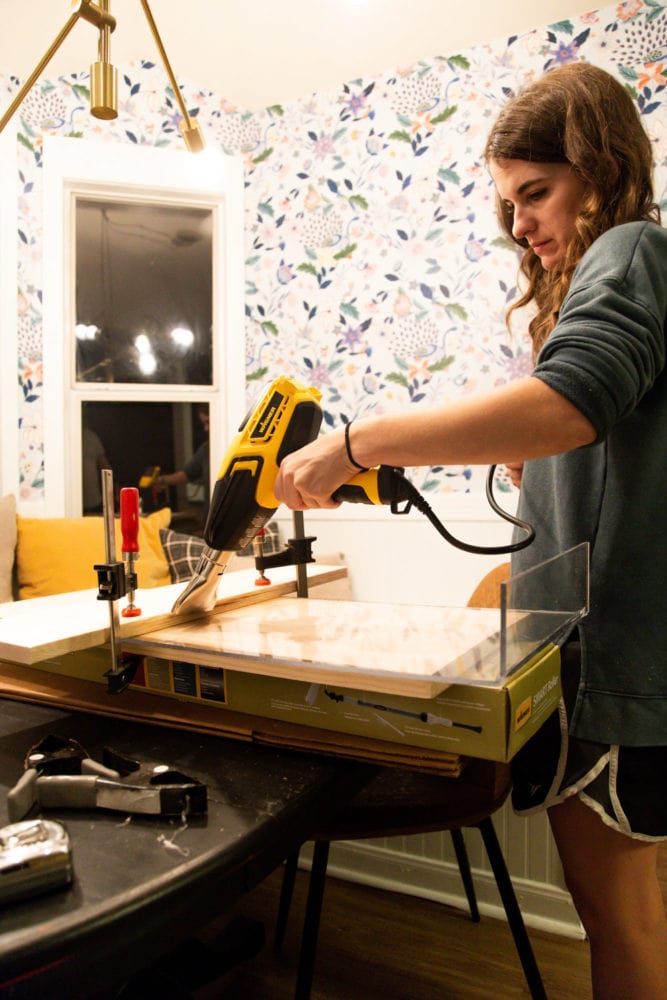
Now, you’re ready for the fun part. Grab your heat gun (here’s the one I use), and apply heat directly to the area right next to where you clamped the wood. You want to keep it as close to the edge of the wood as possible (I actually rested the metal part of my heat gun on the wood to ensure I stayed steady as I worked) and keep your hand moving at a slow and steady pace.
I found that it worked best when I had my heat gun set to about 800 degrees and applied heat for about 4 minutes and 30 seconds. I just set a timer and slowly moved the heat gun back and forth right where I planned for the bend to be. Be sure not to rush this – if you try to bend it before it’s ready, it will crack!
Once you’ve applied heat for about four and a half minutes, your acrylic should be ready to bend. Set your heat gun aside (be sure to turn it off!) and grab the end of the acrylic closest to you. Sloooooooowly fold it all the way up. I used my speed square to hold the acrylic at a 90-degree angle for about a minute while it cooled off, but I wish I would have let it be a slightly more gentle bend so that the legs aren’t straight up and down.
You only need to wait for about 30 seconds to a minute before the tray is ready to be un-clamped.
A quick note: I’ll go ahead and take this moment to recommend that you save your scrap piece of acrylic and use that to get a feel for the project before you do it with the main piece. This is what I did and it’s the best way to get a feel for how the acrylic bends, how you know when it’s ready, and all that other good stuff!
Repeat on the other side
Carefully flip the entire thing around and do the same thing on the other side. Be careful to measure the exact same length from the edge (we did 3 inches) so the legs are the same length.
And just like that, you’re done!
I used a sanding block to sand down some of the rough edges from cutting, and then I turned it loose to Jackson. He immediately started rattling off all the different ways he could use it (many of which had never crossed my mind), so I think it’s safe to say it’s a success.
He’s already used it a ton, and I have a feeling this is going to become a staple of his day-to-day play time. I love that I was able to make something he’s going to use so much and I also love that it’s actually really cute!
If you’re on the fence about if it’s worth it to grab a heat gun for a project like this, you should check out Wagner’s list of over 100 different ways to use it. Seriously, you’ll find yourself reaching for this little thing way more than you expect! You can grab one from their site, and from most home improvement stores. Be sure to let me know if you try this project – I’d love to see!
The post DIY Acrylic Lap Desk appeared first on Love & Renovations.